Showing posts with label Kids Stuff. Show all posts

Wednesday, April 27, 2011

DIY an Origami Mobile

I feel bad that I dropped the blog ball and didn't see the comments from the previous crafty posts. Since I didn't see any instructions on the web for a circular origami mobile, I thought I should make up for my slackerness by doing a tutorial/how-to so that you can make one of these nifty mobiles for your home too. This is my first how-to/tutorial so I'd love any feedback or suggestions!
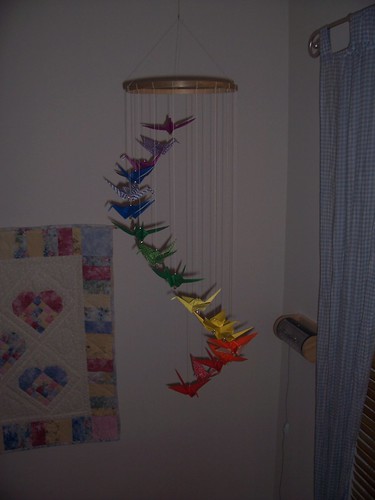
Origami Mobile

Materials:
Origami Paper in a variety of prints and patterns
Beads
Heavy Thread (such as embroidery floss)
Large Needle (such as an embroidery needle)
12" embroidery hoop with the outer hoop removed
Hook
Elmers Glue
Scissors

1.  Fold eighteen (18) origami cranes. There's lot of information on this on the web so I'll skip repeating those instructions here.

2.  Cut the following lengths of thread:  12", 13", 14", 15", 16", 17", 18", 19", 20", 21", 22", 23", 24", 25", 26", 27", 28", and 29".  You should have 18 pieces of thread when you're done.

3.  Tie a knot at the end of the 12" piece of thread.  The knot should be large enough to hold your bead on the thread.  

4.  With the other end of the thread, thread your needle.  Add a bead to your thread and run the needle and thread through the bottom of one crane.  This will be the first crane and shortest crane on the mobile.

5.  Add another bead to the needle and thread.  You should now have a bead under the crane and on top of the crane.  The bead is important because the cranes are made of paper and the hole that the thread runs through can grow slightly in size during the construction process.  We don't want the crane to fall off the thread!

6.  Remove the needle and tie the free end of the thread to the hoop.  Trim any excess thread on either end.   

7.  Repeat steps 3 through 6 for all the pieces of thread - continuing in order from shortest to longest.  Evenly space the cranes around the hoop so that they gradually descend.

8.  Once you've tied all the cranes to the hoop, add a dot of glue where the thread is tied to hoop.  This will keep the thread positions in place.  Let the glue dry before proceeding.

9. Cut 3 more  pieces of thread - each 24" long.   Tie the 3 pieces of thread equally spaced around the hoop.

10.  Gather the three hanging ends of the thread and tie them together in a knot about half way along the length of the thread.  

11.  Tie another knot at the end of the remaining length of the 3 gathered pieces.

12.  Install the hook from the ceiling and hang your mobile!

Because origami is so light, the crane mobile with gentle twirl - an added bonus!

I hope these instructions are easy to follow.  If you have any questions, post them in the comments and I'll answer them or update the post to clarify.  Also, let me know if you think video instructions would be easier to follow.  I've made a few of these, so it seems easy to me - I'd like a newbie perspective.  Thanks!
Saturday, April 21, 2007

Sewing

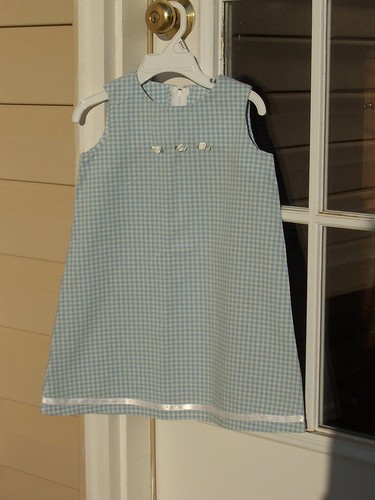
Toddler A-line dress

Ever since I got my iPod, I've been addicted to Podcasts. My favorites are CraftyPod and Material Mama. Material Mama in particular has inspired me to take up sewing again. I know the very basics of sewing - enough to make pillows, curtains, etc, but I wanted to try making clothes for Monkey. I've been somewhat uninspired by the kids clothes in the stores and I've always envisioned Monkey in cute A-line dresses. So with the help and coaching of my MIL, I made this dress from a Simplicity pattern. It only took a few hours and included a zipper which I had never done before. I'm going to reuse the pattern and make lots more dresses :-) I purchased some really cute fabrics from Repro Depot this week just for this purpose. The best thing is that this dress only needs one yard of fabric!

Friday, March 23, 2007

Mobiles

Origami Mobile

I got into making mobiles when I joined a mobile swap. This is the first one I made but was way too big and with too many strings to mail. However I loved how it turned out. We have it hanging in Monkey's room and it gentle rotates and very sootheing.

Friday, March 16, 2007

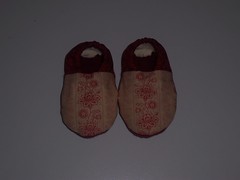
Cloth Baby Shoes

Cloth Baby Shoes
I got the pattern for these shoes from Stardustshoes' blog. They were easy to make, required very little fabric, and came out so cute. I'm giving these as a baby gift this weekend at a shower and am also making several more pairs as gifts. So many people I know have babies or babies in the works that this pattern will definitely get used over and over.

Thursday, February 15, 2007

Divas, Cool Kids, and more


diva shirt, originally uploaded by sim-san.


So I'm already behind on updating this blog but for good reason :-) I've actually been pretty busy crafting and have lots of progress to report.

A while back Old Navy had a sale on plain kids t-shirts so I loaded up on them figuring that they would be perfect for embellishment. I've made several now for Monkey as well as for gifts. Other t's include "Baby Princess", "Foxy", and "Cool Kid". The rhinestones add that extra sparkle that little girls love :-).

Thursday, January 11, 2007

Done!

Cross stitch
I finished the sampler! But even with the satisfaction of completing the project - I still need to get it framed and it could use a little ironing. I'm really happy with the way it turned out though :-)

Tuesday, January 9, 2007

Progress

I've been making excellent progress on finishing my cross stitch sampler. I think in one more stitching session, I'll be done!! This is a pretty major accomplishment for me since I have problems completing my projects which stems from the fact that I like to bite off more than I can chew and so end up starting lots of projects but rarely finish any of them :-) But since I'm close to done, I've already been trolling for my next project. I've settled on this project that I found on another blog. The grocery bag looks very straight forward and since the one in our kitchen has broken, we really need one of these!


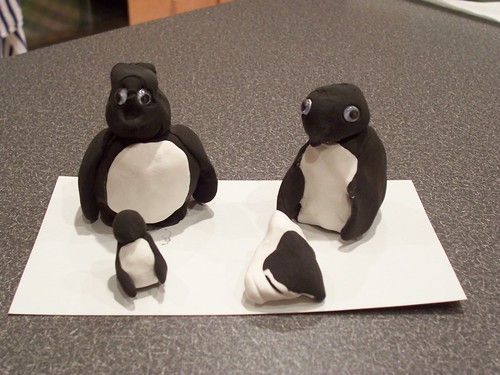
We've also been busy with Monkey doing little craft projects with her. This weekend we went to see Pingu at the National Gallery of Art. Monkey actually sat through most of the movie which is a first for her. Usually she gets scared and wants to leave. Luckily Pingu is not too scary and had the added benefit of having a baby sister (Monkey loves all babies) and with the promise of a craft project at the end of the film - she sat still for most of it. For the project, we made clay penguins (pictures to follow soon) using Crayola modeling clay which I've never tried before. Unlike typical modeling clay, the Crayola brand doesn't require an oven - the clay just air dries which is kind of nice. It's got a more spongy texture to it which makes me wonder what high tech compound is used in the stuff!